59 MINS READ
How to Plan Your First Solo Trip to Southeast Asia: Complete Step-by-Step Guide
Post by Sophie Chen
Disclosure: This post may contain affiliate links, which means I earn a small commission at no extra cost to you if you book through my links. I only recommend services I've personally used and trust. Read More
I remember sitting at my laptop three months before my first solo trip, seventeen browser tabs open, a Google Doc titled "TRIP PLANNING" with exactly three bullet points, and a growing sense of panic.
Visas? Which countries need them? Vaccines? How many? When? Flights? Book now or wait? What if prices go up? Insurance? What kind? Packing? What even goes in a backpack for three months?
I closed my laptop and almost gave up.
The internet has infinite information about Southeast Asia travel, which is precisely the problem. There is an abundance of information available. There is no clear starting point. There was no clear plan to follow. The chaos was overwhelming.
Here's what I wish someone had told me: Planning a solo trip to Southeast Asia isn't complicated—it's just sequential. Do Step 1, then Step 2, then Step 3. That's it.
This guide is the exact planning roadmap I wish I'd had. This guide focuses solely on the logistics, without any unnecessary details or inspiration, as you've already made the decision to travel. By the end, you'll have a clear action plan from today to boarding that plane.
Let's remove the overwhelm and get you on that trip.
START HERE: Your planning is quick-started.
Download my FREE Planning Toolkit:

Plan Your 2026 Southeast Asia Adventures with Confidence ✈️
Get my FREE 52-page Travel Planner Bundle — the exact system I use to organize stress-free solo trips across Southeast Asia. Track budgets, create daily itineraries, manage accommodations, and journal your memories all in one beautiful PDF.
- ✓Full 2026 calendar + monthly trip planning pages
- ✓Budget trackers & expense sheets (perfect for SEA pricing)
- ✓Daily itinerary planners, packing lists & safety checklists
- ✓Travel journal pages to capture every incredible moment
🔒 Your email is safe with me. No spam, just travel tips + occasional freebies. Unsubscribe anytime.
Then follow this article step-by-step. By the end, you'll have a clear action plan!
Planning Timeline: When to Do What (Overview)
Here's the big picture before we dive into details:
| Timeline | Major Tasks | Estimated Cost | Why This Matters |
|---|---|---|---|
| 6 Months Before** (Optional) | • Research destinations • Start saving money • Check passport validity | $0 | Early birds can take advantage of fare sales, but not essential to start this early |
| 4-3 Months Before** (START HERE) | • Book flights • Research visas • Schedule vaccine appointment • Research accommodations | $700-1,200 (flights) | Sweet spot for flight prices; gives time for multi-dose vaccines |
| 2 Months Before | • Apply for e-visas • Buy travel insurance • Get vaccines • Book first week accommodation | $200-400 (insurance, vaccines, visas) | E-visas take 3-7 days; vaccines need 2+ weeks to activate immunity |
| 1 Month Before | • Buy travel gear • Fill prescriptions • Copy documents • Notify banks • Download apps | $200-400 (gear) | Gear shopping takes time; banks need 1-2 weeks notice |
| 2 Weeks Before | • Pack and test gear • Get passport photos • Exchange small currency • Print confirmations | $50-100 (photos, currency) | Final prep time; allows for last-minute purchases if needed |
| 1 Week Before | • Reconfirm flights • Share itinerary with family • Charge all devices • Final document check | $0 | Last chance to catch any issues before departure |
| Day Before/Of | • Final packing check • Airport arrival (3 hours early) • Triple-check passport! | $0 | Travel day—just execute the plan! |
Total One-Time Costs: $1,150–1,700 (flights, insurance, visas, vaccines, gear)
Pro Tip: Can't start 4 months ahead? That's okay. You can compress this timeline to 6-8 weeks if needed, but give yourself at least 2 months for vaccines to activate properly.

6 Months Before (Optional Early Start)
If you are a planner or traveling during peak season, consider researching destinations through blogs, YouTube, and Reddit.
- Research destinations (blogs, YouTube, Reddit)
- Start saving money aggressively
- Check your passport's expiration date to ensure it has at least 6 months of validity.
- Follow travel accounts for inspiration
Reality: Most people don't start this early. 3-4 months is fine.
4-3 Months Before (ACTUAL START)
This is when real planning begins:
✓ Book flights (sweet spot for pricing)
- Use Google Flights, Skyscanner
- Budget: $600-1,200 US to Southeast Asia
- Set price alerts if not ready to book
✓ Research visa requirements
- Check which countries you'll visit
- Determine if you need to apply in advance
- Budget: $100-200 for multiple countries
✓ Schedule travel clinic appointment
- Some vaccines require multiple doses over months
- Book appointment even if you haven't decided all countries
- Budget: $200-400 for vaccines
✓ Start researching accommodation
- Read Hostelworld reviews
- Save favorites
- Don't book yet (too early)
2 Months Before (Building Momentum)
✓ Apply for e-visas (if needed)
- Vietnam: 3-7 days processing
- Cambodia: 3 days
- Apply early (don't stress last minute).
✓ Buy travel insurance
- Must buy before departure
- I use SafetyWing: $42/month
- Compare a few options
✓ Get vaccines
- Hepatitis A (single dose or first of series)
- Typhoid
- Update Tetanus if needed
✓ Book first week accommodation
- 3-5 nights in first city
- Hostelworld or Booking.com
- Central location, high ratings
✓ Create rough itinerary
- Which countries/cities
- Approximate timing
- Don't overplan.
1 Month Before (Gear Up)
✓ Buy travel gear
- Backpack (Osprey Farpoint 40L recommended)
- Packing cubes
- Travel accessories
- Budget: $200-400
✓ Get prescriptions filled
- 3+ months supply
- Bring prescription copies
✓ Copy important documents
- Passport (email PDF + print)
- Insurance documents
- Credit cards (front/back)
✓ Notify banks
- Call credit card companies
- Tell them travel dates and countries
- Get international customer service numbers
✓ Download apps
- Grab Maps.me and Google Translate
- Download offline maps
- Hostelworld, Booking.com
✓ Book must-do experiences
- Elephant sanctuaries (sell out)
- Ha Long Bay cruises
- Anything specific you'd regret missing
2 Weeks Before (Final Prep)
✓ Pack and test
- Pack everything
- Wear backpack, walk around
- Remove 30% of what you packed (you overpacked)
✓ Get passport photos
- 6-8 copies for visas
- Walgreens/CVS ($15)
✓ Exchange small amount of currency
- $50-100 for arrival day
- ATMs have better rates for the rest.
✓ Print confirmations
- Flight confirmations
- First accommodation
- Insurance documents
- Keep digital copies too
1 Week Before (Almost There!)
✓ Reconfirm flights
- Check for any changes.
- Online check-in if available
✓ Final document check
- Passport valid? (6+ months)
- Visas approved?
- Insurance active?
✓ Share itinerary
- Email the family a detailed plan.
- First-week accommodation addresses
- Emergency contacts
✓ Charge all devices
- Phone, laptop, power bank, camera
- Test everything works
Day Before / Day Of
✓ Final packing check
- Passport in carry-on (NOT checked bag)
- Valuables in carry-on
- One change of clothes in carry-on (in case checked bag lost)
✓ Goodbyes and excitement
- Last dinner with family/friends
- Try to sleep (you won't—too excited!)
- Set 2-3 alarms
✓ Airport arrival
- 3 hours early for international
- Double-check passport
- Breathe—you're actually doing this!
HOW I PLANNED MY FIRST SOLO TRIP (Real Timeline)
4 Months Before (January):
- Decided to go (scary!)
- Researched Thailand vs Vietnam vs Bali
- Started saving $800/month
- Got passport photos taken
3 Months Before (February):
- Booked flights: LAX → Bangkok $780 round-trip (Google Flights)
- Applied for Vietnam e-visa: $25, approved in 3 days
- Scheduled UCLA Travel Clinic appointment: $85 consult fee
2 Months Before (March):
- Got vaccines: Hep A ($80) and Typhoid ($60) at travel clinic
- Bought SafetyWing insurance: $42/month
- Researched hostels for hours (saved 15 favorites)
- Didn't book yet (too early)
1 Month Before (April):
- Booked first week: Lub d Bangkok Silom 5 nights ($45 total) → [Hostelworld]
- Ordered Osprey Farpoint 40L: $160 Amazon
- Downloaded: Grab, Maps.me, Google Translate, XE Currency
- Called Chase and Capital One: "Traveling May 1-August 1, Thailand/Vietnam/Bali"
2 Weeks Before (mid-April):
- Packed everything, tested backpack (too heavy)
- Removed half my clothes
- Bought door lock ($12), money belt ($15), and a power bank ($35)
- Made copies of passport, emailed PDFs to myself
- Shared itinerary with mom (she cried but was supportive)
1 Week Before (late April):
- Reconfirmed Thai Airways flight
- Downloaded Bangkok offline map
- Practiced using Grab app
- Got $100 USD exchanged (for first day)
- Printed: flight confirmation, hostel booking, insurance card
Day Before (April 30):
- Repacked AGAIN (still too much)
- Charged everything
- Last Target run: sunscreen, mosquito repellent
- Couldn't sleep (too excited/nervous)
- Set 3 alarms
Departure Day (May 1):
- Checked passport 47 times
- Flight took off
- I cried (relief + fear + excitement)
- Best decision ever
Result: Smooth departure, felt prepared, zero major issues
What I'd change: Would've packed 50% less clothing. Only needed half of what I brought.
Visa Requirements by Country (Essential Information)
CRITICAL: Requirements vary by nationality. Below is for US citizens. Always verify your country's embassy websites.
| Country | Visa Type | Cost | Duration | Processing Time | Extension Possible? | How to Apply | Notes |
|---|---|---|---|---|---|---|---|
| Thailand | Visa-Exempt | FREE | 60 days | Instant (on arrival) | Yes (+30 days, $60) | Just show up | Easiest entry in SEA |
| Vietnam | E-Visa | $25 | 90 days | 3 business days | Difficult (exit/re-enter) | evisa.xuatnhapcanh.gov.vn | Apply 1 week before |
| Indonesia/Bali | Visa on Arrival (VOA) | $35 | 60 days | Instant (at airport) | Yes (+30 days, $50-75) | Pay at airport | Can get 90 days total |
| Philippines | Visa-Exempt | FREE | 30 days | Instant (on arrival) | Yes (~$50/month) | Just show up | Extensions super easy |
| Cambodia | E-Visa | $36 | 30 days | 3 business days | Yes (+30 days, $45) | evisa.gov.kh | Worth $6 extra vs arrival |
| Laos | Visa on Arrival | $30-42* | 30 days | Instant (at border) | Yes (expensive) | Pay at border, bring photo | *Price varies by nationality |
| Malaysia | Visa-Exempt | FREE | 90 days | Instant (on arrival) | Yes | Just show up | 90 days FREE! |
| Singapore | Visa-Exempt | FREE | 30-90 days | Instant (on arrival) | Varies | Just show up | Duration depends on nationality |
Total Visa Costs (if visiting all): ~$130-180
💡 Money-Saving Tip: Thailand, the Philippines, Malaysia, and Singapore = FREE entry (4 countries, $0). Only pay for Vietnam ($25), Cambodia ($36), Indonesia ($35), and Laos ($30-42), which is $126-138 total.
📋 General Requirements (All Countries):
- Passport valid 6+ months from entry
- 2-3 blank pages for stamps
- Proof of onward travel (sometimes checked)
- Proof of sufficient funds (rarely checked but have credit card ready)
🔗 Official Resources:
- Thailand: [thai-embassy.com]
- Vietnam: [evisa.xuatnhapcanh.gov.vn]
- Cambodia: [evisa.gov.kh]
- Others: Search "[country] embassy [your country]."
Last Updated: December 2024 (Requirements change—always verify on official embassy websites before booking!)
Thailand: Easiest Entry
Visa Requirements:
- 60+ nationalities: 60 days visa-exempt (FREE)
- Just show up, get stamped in
- No advance application needed
Extension:
- Can extend 30 additional days at immigration office
- Cost: 1,900 baht (~$60)
- Total possible: 90 days
Requirements:
- Passport valid 6+ months
- Proof of onward travel (sometimes checked)
- Proof of funds (rarely checked)
My experience: I walked through Bangkok Immigration, got stamped, and it took 3 minutes. It was the most straightforward process I have ever encountered.
Official source: [Thai Embassy Website]
Vietnam: E-Visa Easy
Visa Options:
- E-visa: 90 days, single/multiple entry, $25
- Visa-exempt: Some nationalities get 45 days free (check if yours)
E-Visa Process:
- Go to evisa.xuatnhapcanh.gov.vn
- Fill out application (15 minutes)
- Upload passport photo
- Pay $25 USD
- Wait 3 business days
- Print approval and show at arrival
My experience: Applied Monday, approved Thursday. Printed PDF, shown at Hanoi airport, stamped in. Easy.
Extension: Difficult and expensive. Easier to exit and re-enter if you need more time.
Official source: [Vietnam Immigration Department]
Bali/Indonesia: Visa on Arrival
Visa Options:
Option 1: Visa on Arrival (VOA)
- Cost: 500,000 IDR (~$35) at airport
- Duration: 60 days
- Extension: Can extend once for 30 days ($50-75 through agent)
- Total: 90 days possible
Option 2: Visa-Exempt
- Some nationalities: 30 days FREE
- Cannot extend
- Check if yours qualifies.
Option 3: B211A Tourist Visa (for long stays)
- Duration: 60 days, can extend 4 times
- Total: 6 months possible
- Cost: $50-100 initial + $40-60 per extension
- Must apply through agent before arrival
What I did: Paid $35 for VOA at Bali airport. Extended once for 30 days ($60 through a hostel-recommended agent). Total: 90 days.
Official source: [Indonesia Immigration]
Philippines: Free Entry, Easy Extensions
Visa Requirements:
- Most nationalities: 30 days visa-exempt (FREE)
- Just show up
Extensions:
- Can extend up to 3 years (seriously!)
- Cost: ~$50 per monthly extension
- The process at immigration offices (easy)
My experience: I Got 30 days free on arrival. Extended twice in Cebu ($50 each time). Process took 1 hour each time.
Official source: [Philippine Bureau of Immigration]
Cambodia: E-Visa or Arrival
Visa Options:
Option 1: E-Visa (recommended)
- Cost: $36
- Duration: 30 days
- Apply at evisa.gov.kh
- Processing: 3 business days
- Print and show at arrival
Option 2: Visa on Arrival
- Cost: $30 + may ask for "fees" (bribes)
- Bring 1 passport photo
- Fill out a form at the border.
- Sometimes hassle
Extension:
- $45 for additional 30 days
- Available at travel agencies
What I recommend: E-visa. It's worth the extra $6 to avoid border hassles.
Official source: [Cambodia E-Visa Portal]
Laos: Visa on Arrival
Visa Requirements:
- Visa on Arrival: 30 days
- Cost: $30-42 (varies by nationality)
- Bring 1-2 passport photos
- Fill form at border
Extension:
- Possible but expensive
- It's better to plan 30 days or less.
My experience: I Paid $35 at Luang Prabang airport and got a passport photo from a machine there ($5). Quick process.
Official source: [Laos Tourism Information]
Malaysia: No Visa Needed
Visa Requirements:
- Most nationalities: 90-day visa-exempt (FREE)
- Just show up
Extension:
- Can extend at the immigration office.
My experience: Easiest entry. There are no forms required, only a stamp. I was granted a period of 90 days.
Official source: [Malaysia Immigration]
Singapore: No Visa Needed
Visa Requirements:
- Most nationalities: 30-90 day visa-exempt (FREE)
- Duration depends on nationality
My experience: 30 days on arrival, no questions asked.
VISA CHEAT SHEET (US Citizens—Others Check Embassy!)
THAILAND:
- 60-day visa-exempt FREE ✓
- Extension: +30 days at immigration ($60)
- Total possible: 90 days
VIETNAM:
- E-visa: 90 days for $25
- Apply online 1 week before
- Easy process, approved in 3 days
BALI/INDONESIA:
- Visa on arrival: 60 days for $35 (at airport)
- Extension: +30 days ($50-75 through agent)
- Total: 90 days
PHILIPPINES:
- 30-day visa-exempt FREE ✓
- Extension: ~$50/month (easy process)
CAMBODIA:
- E-visa: 30 days for $36
- OR Visa on arrival: $30 (bring passport photo)
LAOS:
- Visa on arrival: $30-42
- 30 days
- Bring passport photo
MALAYSIA:
- 90-day visa-exempt FREE ✓
IMPORTANT: Check YOUR nationality (these are US requirements only)
Official resources: Each country's embassy website
Total visa costs (if visiting all): ~$150-200
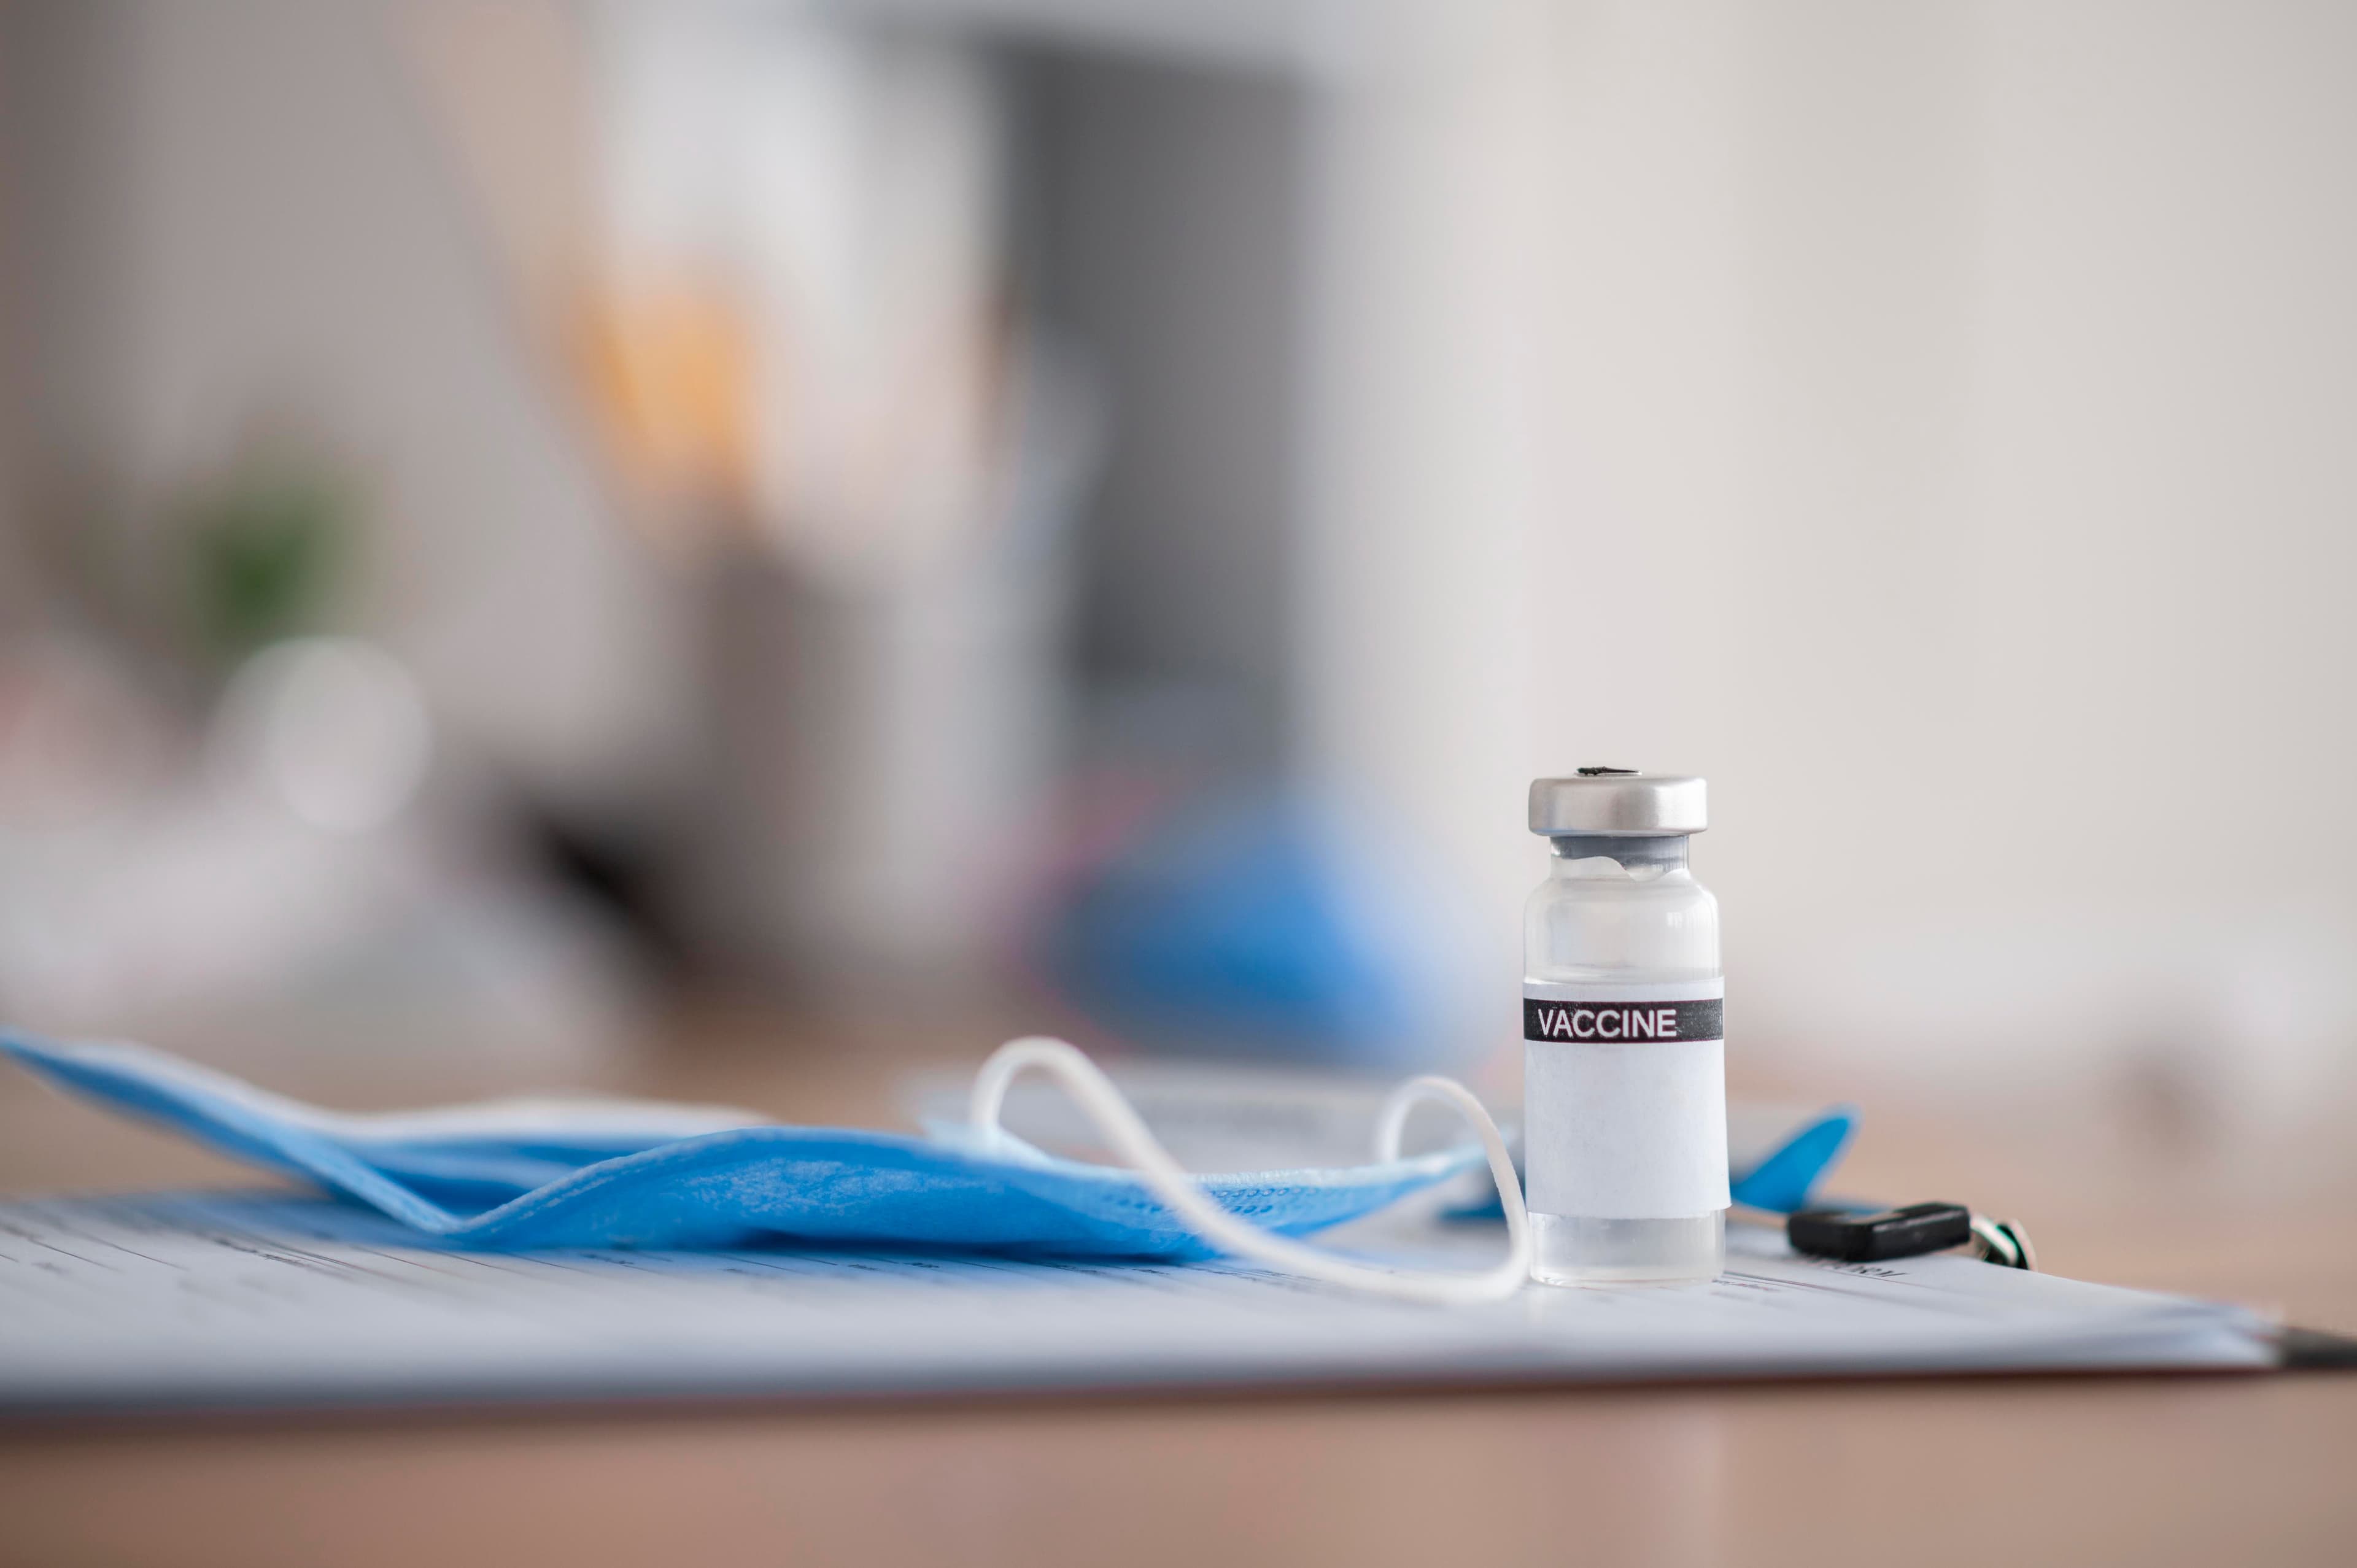
Vaccines and Health Preparation
Let me be clear: Most Southeast Asian countries do NOT require vaccines for entry. But getting certain vaccines is smart for your health.
Required Vaccines (Very Few)
Yellow Fever:
- Required ONLY if arriving from infected country (parts of Africa, South America)
- Must have yellow card as proof
- Southeast Asia itself doesn't require it unless coming from infected area
COVID-19:
- Requirements change frequently
- Check current requirements before booking
- As of late 2024, most countries dropped requirements
That's it. No other vaccines are legally required.
Recommended Vaccines (Smart to Get)
Hepatitis A (Highly Recommended)
- What it prevents: Food/waterborne illness
- Why you need it: You'll eat street food (it's amazing)
- Dose: 1 shot; protection starts 2 weeks later
- Booster: 6-12 months for lifetime protection
- Cost: $80-100
- Get this one—non-negotiable
Typhoid (Highly Recommended)
- What it prevents: Food/waterborne bacterial infection
- Why you need it: Street food, local restaurants
- Options: Shot (1 dose) or pills (4 doses over week)
- Protection: 2-5 years
- Cost: $60-100
- Get this too
Hepatitis B (Recommended for long-term)
- What it prevents: Blood/bodily fluid transmission
- Why you might need it: Tattoos, medical procedures, accidents
- Dose: 3 shots over 6 months
- Cost: $50-80 per shot ($150-240 total)
- If traveling 3+ months or planning tattoos/medical work
Japanese Encephalitis (Optional for most)
- What it prevents: Mosquito-borne virus
- Who needs it: Extended rural stays, rice farming areas
- Cost: $300-350 (2 doses)
- Skip unless spending months in rural areas
Rabies (Optional for most)
- What it prevents: Rabies from animal bites
- Who needs it: Working with animals in very remote areas
- Cost: $300-400 (3 doses)
- Note: Still need post-exposure shots if bitten, but fewer
- Skip unless specific animal work planned
Tetanus/Diphtheria (Update if needed)
- Standard vaccine; make sure it is current
- Booster every 10 years
- Cost: $40-60 if needed
Vaccine Timeline (Work Backwards)
3–4 months before the trip:
- Schedule travel clinic consultation ($50-150)
- Discuss travel plans, get recommendations
- Start multi-dose vaccines if needed (Hep B, Rabies)
2-3 Months Before:
- Get second doses of multi-dose vaccines
1 Month Before:
- Get single-dose vaccines (Hep A, Typhoid)
- Get final doses of series vaccines
2 Weeks Before:
- All vaccines completed
- Immunity active
My timeline:
- 3 months before: Travel clinic consult ($85)
- 2 months before: Hep A shot ($80), Typhoid shot ($60)
- Already had Tetanus, Hep B from previous travels
- Total: $225 for 2 vaccines + consult
Where to Get Vaccines
Travel Medicine Clinics (Most Comprehensive)
- Pros: Expert advice, all vaccines available, personalized plan
- Cons: Most expensive
- Cost: $50-150 consultation + $50-100 per vaccine
- Examples: Passport Health, local university travel clinics
CVS/Walgreens Travel Clinics (Cheaper)
- Pros: Cheaper, convenient, no appointment
- Cons: Limited selection, less personalized advice
- Cost: $40-80 per vaccine
Health Department (Cheapest)
- Pros: Very cheap or free
- Cons: Limited vaccines, long waits, less convenient
- Cost: $0-40 per vaccine
My recommendation: Travel clinic for first consults and hard-to-find vaccines, then CVS for basics.
Medications to Bring
Diarrhea Management:
- Imodium (loperamide)—stops diarrhea
- Oral rehydration salts
- You WILL get "Bali belly" eventually
Antibiotics (Prescription needed)
- Azithromycin (Z-pack) for severe food poisoning
- Ask doctor for travel prescription
Pain Relief:
- Ibuprofen (Advil)
- Acetaminophen (Tylenol)
Antihistamine:
- Benadryl or Zyrtec for allergies
Motion Sickness:
- Dramamine if prone to nausea
Your Prescriptions:
- Bring 3+ months supply (or full trip)
- Bring prescription copies
- Keep in original bottles
Malaria: Do You Need Antimalarials?
Short answer for most travelers: No.
Malaria risk in Southeast Asia:
- Low/no risk: Bangkok, Chiang Mai, Hanoi, HCMC, Bali, Kuala Lumpur, Singapore (major cities)
- Low risk: Most tourist areas
- Higher risk areas include rural Cambodia, the Myanmar borders, remote Philippines, and deep jungle regions.
Most budget travelers visiting tourist areas DON'T need antimalarials.
What you DO need:
- DEET mosquito repellent (30%+ DEET)
- Long sleeves at dawn/dusk
- Sleep under mosquito net if available
- Air-con accommodations (mosquitoes don't like AC)
When to consider antimalarials:
- Extended time in rural/jungle areas
- Trekking in high-risk zones
- Living/volunteering in rural villages
Consult a travel clinic—they'll assess your specific itinerary.
Dengue Fever (Bigger Concern Than Malaria)
Reality: Dengue is more common than malaria in Southeast Asian cities.
Negative news: No widely-available vaccine
Prevention:
- DEET repellent (30-50% DEET)
- Long sleeves/pants at dawn and dusk
- Accommodations with screens or AC
- Avoid standing water areas
My experience: Never got dengue in 2+ years, but met travelers who did. Miserable for 1-2 weeks but usually not dangerous.
Travel Health Insurance (Essential)
Why you need it:
- Hospital visit can cost $1,000-5,000+
- Medical evacuation: $50,000+
- Medications and prescriptions add up
- One emergency wipes out your trip budget
What I use: SafetyWing
- Cost: $42-58/month (depends on age)
- Coverage: Medical, evacuation, prescriptions, some theft
- Pros: Month-to-month (no minimum), covers multiple countries, affordable
- Cons: $250 deductible
Must buy BEFORE leaving home—can't get coverage after departure.
What to Pack: Complete Solo Female Traveler Packing List
Packing Philosophy That Actually Works:
- Pack for 1 week; do laundry weekly
- Bring half the clothes, twice the money
- You can buy almost anything there cheaper
- If you're not certain, don't bring it
The Luggage Decision
Backpack vs. Suitcase:
I recommend the Osprey Farpoint 40L Backpack ($160)
- Carry-on size (fits overhead bins)
- Comfortable straps
- Opens like suitcase
- Durable (mine lasted 2+ years)
- [Buy on Amazon]
Why backpack > suitcase:
- Hostels have stairs (no elevators)
- Cobblestone streets
- Buses without storage
- Hands-free navigation
Size matters:
- 40L: Perfect (carry-on size, enough space)
- 60L+: Too big (you'll overpack, checking fees)
- Under 35L: Too small unless ultra-minimalist
Clothing (7-10 Days Maximum)
Why only 1 week of clothes?
- Laundry is $1-2/kg in Southeast Asia
- You'll wear same 5 outfits on repeat anyway
- Hot climate = clothes dry overnight
- Less weight = easier travel
Tops:
- 5–7 t-shirts/tank tops (quick-dry fabric)
- 1 light cardigan (for over-air-conditioned places)
- 1 long-sleeve shirt (sun protection, temples)
- 1 nice top (for going out)
Bottoms:
- 2-3 pairs shorts
- 2 pairs lightweight pants (one zip-off convertible ideal)
- 1 maxi skirt OR dress (versatile—beach, temples, going out)
- 1 sarong ($5 in SEA—buy there, use as skirt/beach cover/blanket/towel)
Underwear:
- 7 pairs (quick-dry ExOfficio style)
- 3-4 bras (1 sports bra for activities)
Sleepwear:
- Tank top and shorts (or sleep in day clothes)
Outerwear:
- 1 light rain jacket (packable)
Swimwear:
- 2 swimsuits (one to wear, one to wash)
Shoes (3 pairs MAXIMUM):
- 1 pair walking shoes/sneakers (comfortable for all-day walking)
- 1 pair flip-flops/slides
- 1 pair nicer sandals (can dress up/down)
Temple-Appropriate Coverage:
- Long pants or maxi skirt
- Shawl/scarf for shoulders
- OR just buy sarong there for $3-5
Toiletries (Bring Minimal)
Bring from home:
- Travel-size shampoo/conditioner (buy full-size there)
- Soap/body wash
- Toothbrush and toothpaste
- Deodorant (SE Asian versions different—bring yours)
- Sunscreen SPF 50+. (expensive there—bring it)
- Mosquito repellent with DEET 30%+
- Face wash
- Moisturizer
- Razor
- Hair ties
- Basic makeup (if you wear it)
Buy there:
- Full-size shampoo/conditioner ($3-5)
- Body lotion
- Contact solution
- Cotton swabs
- Nail clippers
Feminine hygiene:
- Tampons are hard to find in Southeast Asia, so consider bringing a supply or switching to a menstrual cup.
- Pads available everywhere
- Menstrual cup: game-changer for travel
My toiletries bag: Fit everything in a quart-size bag. If it doesn't fit, I don't need it.
Tech & Electronics
Essential:
- Smartphone + charger
- Power bank (20,000 mAh minimum—charges phone 6-7 times)
- Anker recommended
- Universal adapter (Type A/C for SEA)
- Headphones (noise-canceling worth it for flights)
If Needed:
- Laptop/tablet (only if working remotely or on a long trip)
- E-reader (Kindle)—better than heavy books
- Camera (or just use phone—phone cameras are great now)
Charging cables:
- Bring backups (cables break)
- Consider multi-device cable
My setup:
- iPhone + charger
- Anker PowerCore 20,000 ($35)
- Universal adapter ($12)
- AirPods
- Kindle
- No laptop (used phone for everything)
Documents (DO NOT FORGET)
Critical documents:
- Passport (6+ months validity, 2-3 blank pages)
- Passport photos (6-8 copies for visas)—get at CVS ($15)
- Travel insurance documents (print + digital)
- Vaccination records (yellow fever card if applicable)
- Visa approval letters (Vietnam e-visa, etc.)
Financial:
- Credit cards (2-3 from different banks)
- Debit card (Charles Schwab ideal for ATM refunds)
- Emergency cash ($200-300 USD hidden)
Copies:
- Photocopy EVERYTHING
- Email yourself PDFs
- Leave copies with family at home
- Store in a separate location from the originals.
Safety & Security Gear
Essential safety items:
- Money belt or hidden pocket ($15) → [Amazon]
- Luggage locks (TSA-approved for checked bag)
- Padlock for hostel lockers → [Amazon]
- Portable door lock (Addalock $12) → [Amazon]
- Whistle on keychain
Total cost: ~$50 for peace of mind
Comfort & Convenience
Hostel essentials:
- Microfiber towel (hostels often don't provide) → [Amazon]
- Earplugs and eye mask (dorm survival kit)
- Sleep sheet (optional but nice)
Daily use:
- Reusable water bottle (LifeStraw filter version ideal)
- Daypack (15-20 L for day trips)—can be packable tote
- Packing cubes (organization game-changer) → [Amazon]
- Laundry bag (or plastic bag)
- Ziplock bags (various sizes for organizing)
First aid:
- Small kit: Band-aids, antiseptic, blister treatment
- Pain reliever, antihistamine, anti-diarrheal
- Prescription meds
Nice-to-have:
- Clothesline and clips (for drying laundry)
- Sewing kit (tiny)
- Headlamp or small flashlight
- Travel pillow (for flights)
What NOT to Pack (Common Mistakes)
❌ Hair dryer—Hostels have them OR just air dry
❌ Full-size toiletries—Buy them there, save weight
❌ More than 1 week clothes—you'll wear same outfits
❌ Expensive jewelry - Theft risk, you won't wear it
❌ Too many shoes—3 pairs MAX
❌ Physical books - Heavy; use Kindle
❌ "Just in case" items —if you're not sure, don't bring them.
❌ Fancy camera (unless you're a photographer)—phone works great
Final Packing Test
After packing everything:
- Lift test: Can you carry your pack comfortably for 30 minutes?
- If no: Remove 30% of contents
- Wear it: Walk around block with full pack
- Still too heavy? Remove another 20%
Target weight:
- Ideal: 15-18 lbs (7-8 kg)
- Maximum: 22 lbs (10 kg)
- If over 25 lbs: You've overpacked significantly
My first trip:
- Packed 28 lbs
- Realized day 1 it was too heavy
- Shipped stuff home from Bangkok
- Learned my lesson
My trips now: 16 lbs, including laptop. Comfortable, manageable, stress-free.
WHAT TO BOOK BEFORE YOU LEAVE (Critical!)
3-4 MONTHS BEFORE:
- ✓ Flights (sweet spot pricing) - Book on Google Flights
- ✓ Travel Insurance (can't buy after departure) - SafetyWing
2 MONTHS BEFORE:
- ✓ First week accommodation (need address for arrival)
- ✓ Any e-visas (takes 3-7 days processing)
1 MONTH BEFORE:
- ✓ Must-do experiences if they sell out:
- Elephant Nature Park Thailand
- Ha Long Bay overnight cruise
- Any scuba diving courses
DON'T BOOK YET:
❌ Accommodation beyond first week (lose flexibility + waste money if plans change)
❌ Specific day tours (book 1-3 days ahead)
❌ Inter-city transport (book as you go)
❌ Restaurants (just show up)
Flexibility = Freedom
Booking Flights: Strategy and Timing
When to Book Flights
Sweet Spot: 2-4 months before departure
Pricing timeline:
- 6+ months out: Prices not yet released or very high
- 4-5 months: Prices released, sometimes deals
- 2-4 months: BEST PRICING
- 1 month: Prices start increasing
- Last minute: Expensive (except rare mistake fares)
Exception: Peak season (Christmas, New Year, Chinese New Year)—book 4-6 months ahead
Best Flight Search Tools
Google Flights (My #1 Recommendation)
- Best overall interface
- Flexible date calendar (see cheapest days)
- Price tracking alerts
- Multi-city tool
- Free, no ads
Skyscanner
- Good for multi-city complex routes
- "Everywhere" search (if destination flexible)
- Compares budget airlines well
Kayak
- Explore feature for flexible destinations
- Price forecasting
Momondo
- Sometimes they find cheaper prices than others.
- Great for comparing.
My process:
- Search on Google Flights
- Cross-check Skyscanner
- Book directly with airline (usually same price, better service)
Flight Booking Strategies
Option 1: Round-Trip (Safest, Usually Cheaper)
Pros:
- Usually cheaper than two one-ways
- Meets "proof of onward travel" requirement
- Simpler
Cons:
- Less flexible
- Change fees if plans change
Who should book round-trip:
- First-time travelers
- Fixed trip length (3 months or less)
- Want simplicity
My first trip: Round-trip LAX to Bangkok, $780. Knew I'd be back in 3 months.
Option 2: One-Way (Most Flexible)
Pros:
- Complete freedom
- Can change plans
- Extend trip easily
Cons:
- Usually more expensive
- May need proof of onward travel (some countries require it)
- Need to deal with the exit later.
Proof of an onward travel solution:
- Book refundable flight and cancel after entry
- Use OnwardTicket.com ($16 for 48-hour flight rental)
- Budget airline booking (cancel within 24 hours)
Who should book one-way:
- Long-term travelers (6+ months)
- Digital nomads
- Very flexible plans
Option 3: Multi-City (Efficient for Multiple Countries)
Example:
- Fly INTO Bangkok
- Fly OUT OF Singapore
- Travel overland between
- Saves backtracking
How:
- Google Flights has "multi-city" tool
- Manually enter each leg
- It can be same price as round-trip
My 3-month trip:
- INTO Bangkok
- OUT OF Bali
- Visited Thailand → Vietnam → Cambodia → Bali
- No backtracking, efficient
Budget Airlines in Southeast Asia
Once you're IN Southeast Asia, budget airlines are amazing:
AirAsia (Biggest, Cheapest)
- Flies everywhere in the sea.
- Typical cost: $30-80 per flight
- WARNING: Charges for EVERYTHING (bags, seats, food, sneezing)
VietJet (Vietnam)
- Vietnam domestic and some international
- Super cheap ($20-50)
- Similar fees structure
Nok Air / Thai Lion Air (Thailand)
- Thailand domestic
- Cheap
Scoot (Singapore)
- Singapore budget airline
- Clean, reliable
Budget airline tips:
- Carry-on only (avoid $20-40 baggage fees)
- Book directly on airline site (sometimes cheaper)
- Print boarding pass (fee if printing at airport)
- Bring snacks (food on board is expensive).
Flight Costs (What to Expect)
US to Southeast Asia:
- West Coast (LAX, SFO): $600-1,000
- East Coast (NYC, DC): $800-1,200
- Average: $700-900
Europe to Southeast Asia:
- UK/Western Europe: $400-800
- Eastern Europe: $300-600
- Average: $500-700
Australia to Southeast Asia:
- $300-600
- Often cheaper than flights within Australia!
Within Southeast Asia:
- $30-150 per flight (budget airlines)
- $100-300 (full-service carriers)
My experience:
- LAX → Bangkok round-trip: $780
- Bangkok → Hanoi: $65 (AirAsia)
- Hanoi → Siem Reap: $95 (VietJet)
- Siem Reap → Bali: $150 (AirAsia)
Money-Saving Flight Tips
Timing:
- Fly Tuesday/Wednesday (cheapest days)
- Avoid Friday/Sunday (expensive)
- Red-eye flights cheaper
Booking:
- Use incognito mode (prices can increase with cookies tracking)
- Set up price alerts on Google Flights
- Clear cookies between searches
- Book directly with airline when possible
Routing:
- Consider nearby airports (Don Mueang vs Suvarnabhumi Bangkok)
- Layovers can save money (if you have time)
- Positioning flights (fly to gateway city first, then budget airline)
Example:
- LAX → Tokyo → Bangkok (cheaper than LAX → Bangkok direct)
- Bonus: Can stop in Tokyo
Booking Accommodation: Strategy and Timing
Golden Rule: Book the first week before leaving; book the rest as you go.
First Week Strategy (ALWAYS Book Ahead)
Why book the first week in advance:
- Tired after a long flight.
- Need an address for a customs form.
- Avoid decision fatigue
- Peace of mind
What to book:
- 3-5 nights in first city
- Centrally located hostel
- High rating (8.0+ on Hostelworld)
- Near public transport
When to book:
- 1-2 weeks before departure
- Peak season: 2-4 weeks ahead
My first trip:
- Booked Lub d Bangkok Silom
- 5 nights, $45 total ($9/night dorm)
- Perfect location, great reviews
- No stress on arrival!
After the first week, it is recommended to book 1-3 days in advance.
Would you consider booking everything in advance?
Flexibility:
- Love a city? Stay longer
- Hate a city? Leave sooner
- Meet people? Travel together
- Better deals booking late
How I book as I go:
- Research next city while in current city
- Read Hostelworld reviews
- Book 1-3 days before arrival
- Use Hostelworld app on phone
Exception: Peak season (Dec-Feb), book 5-7 days ahead
Best Booking Platforms
Hostelworld (Best for Hostels & Meeting People)
Pros:
- Best hostel selection
- Real reviews (verified guests)
- "Vibe" ratings (shows social atmosphere)
- Can read reviews by solo travelers specifically
Cons:
- Booking fee ($2-5 per reservation)
- Limited hotels
When to use: Booking hostels, want social atmosphere
Booking.com (Best for Hotels/Guesthouses/Private Rooms)
Pros:
- Huge selection (hotels, hostels, apartments)
- Free cancellation on most
- No booking fees
- Genius loyalty discounts
Cons:
- Less hostel-focused
When to use: Private rooms, hotels, guesthouses, want free cancellation
Agoda (Best Deals in Asia)
Pros:
- Strong in Southeast Asia specifically
- Good deals
- PointsMAX loyalty program
- Often cheaper than Booking.com
Cons:
- Stricter cancellation policies
- Interface less user-friendly
When to use: Mid-range hotels, long-term stays (7+ days)
Airbnb (For Longer Stays/Apartments)
Pros:
- Apartments with kitchens
- Monthly discounts (30+ days)
- Local neighborhoods
Cons:
- More expensive than hostels
- Less social (no common areas)
- Cleaning fees add up
When to use: 1+ month stays, need kitchen, working remotely
Booking Timeline Strategy
Week 1: Booked before leaving home
Weeks 2-4: Book 2-3 days ahead
Month 2+: Book 1 day ahead OR walk-in
Peak Season Exception (Dec-Feb):
- Thailand islands: Book 1 week ahead
- Everywhere else: 3-5 days ahead
Accommodation Costs (Budget Planning)
Hostel Dorm Bed:
- Thailand: $7-12/night
- Vietnam: $6-10/night
- Bali: $10-15/night
- Cambodia: $6-10/night
- Laos: $5-8/night
- Malaysia: $8-12/night
Budget Private Room:
- Thailand: $15-25/night
- Vietnam: $12-20/night
- Bali: $18-30/night
- Others: $15-25/night
Mid-Range Hotel:
- $30-60/night across SEA
My average: $9/night (hostels + occasional private room)
Travel Insurance: What You Actually Need
I almost skipped this section. Then I remembered my friend's $8,000 hospital bill in Thailand.
Travel insurance is non-negotiable.
Why You Actually Need It
Real scenarios:
Medical emergency:
- Appendicitis in Thailand: $5,000-8,000
- Food poisoning needing IV: $500-1,200
- Motorcycle accident: $2,000-15,000+
- Dengue fever hospitalization: $3,000-6,000
Medical evacuation:
- Serious injury/illness needing flight home: $50,000-100,000+
Theft:
- Phone, laptop, camera stolen: $500-2,000
Trip cancellation:
- An emergency at home requires me to fly back, incurring flight costs.
One incident without insurance = trip over.
What coverage do you need?
Minimum requirements:
Medical expenses: $100,000+ coverage Emergency evacuation: $500,000+ Theft/baggage: $1,000-3,000 Trip cancellation: Up to trip cost 24/7 assistance: Yes
Important details to check:
Pre-existing conditions:
- Covered or excluded?
- Need to disclose?
Adventure activities:
- Scuba diving covered? (check depth limits)
- Rock climbing?
- Zip-lining?
- Motorcycle/scooter: Often EXCLUDED (read fine print!)
Electronics limits:
- What is the laptop's coverage limit?
- Camera limit?
- Phone coverage?
Deductible:
- Lower deductible = higher premium
- $0 vs $250 vs $500
Recommended Insurance Options
SafetyWing (What I Use & Recommend)
Cost: $42-58/month (age-based)
Coverage:
- Medical: $250,000
- Evacuation: $100,000
- Theft: Limited
- Trip interruption: $5,000
Pros:
- Month-to-month (no long commitment)
- Covers multiple countries automatically
- Very affordable
- Digital nomad-friendly
- Can buy after departure (rare!)
Cons:
- $250 deductible
- Limited electronics coverage ($500 max)
- Scooter accidents excluded
Best for: Long-term travelers, budget travelers, digital nomads
World Nomads
Cost: $50-100/month (trip-based)
Coverage:
- Comprehensive medical
- Good theft coverage
- Adventure sports included
- Emergency assistance excellent
Pros:
- Well-known, trusted
- Great claims process
- Adventure activities covered
- You can buy after departure.
Cons:
- More expensive
- Trip-based (not month-to-month)
Best for: Short trips (1-3 months), adventure travelers, comprehensive coverage wanted
Allianz
Cost: Varies (trip-based)
Best for: Short trips (1-2 weeks), families
IMG Global
Cost: $40-80/month
Best for: US citizens wanting US-based company
What's Usually NOT Covered
Read the fine print:
❌ Scooter/motorcycle accidents (most policies exclude or charge extra)
❌ Pre-existing conditions (unless disclosed and approved)
❌ Extreme sports (bungee, BASE jumping, etc.)
❌ Illegal activities
❌ Alcohol/drug-related incidents
❌ War zones, terrorism (check travel warnings)
❌ Valuables left unattended (must be locked)
When to Buy Insurance
BEFORE you leave home.
Most policies cannot be purchased after departure (SafetyWing is a rare exception).
Best time:
- When you book flights
- At least two weeks before departure.
- Some benefits are only activated if bought within 14 days of the first trip payment.
My experience:
- Bought Safety Wing Day: I booked flights.
- Used it once (food poisoning, $340 hospital bill)
- Insurance paid minus $250 deductible
- Saved $90 + peace of mind
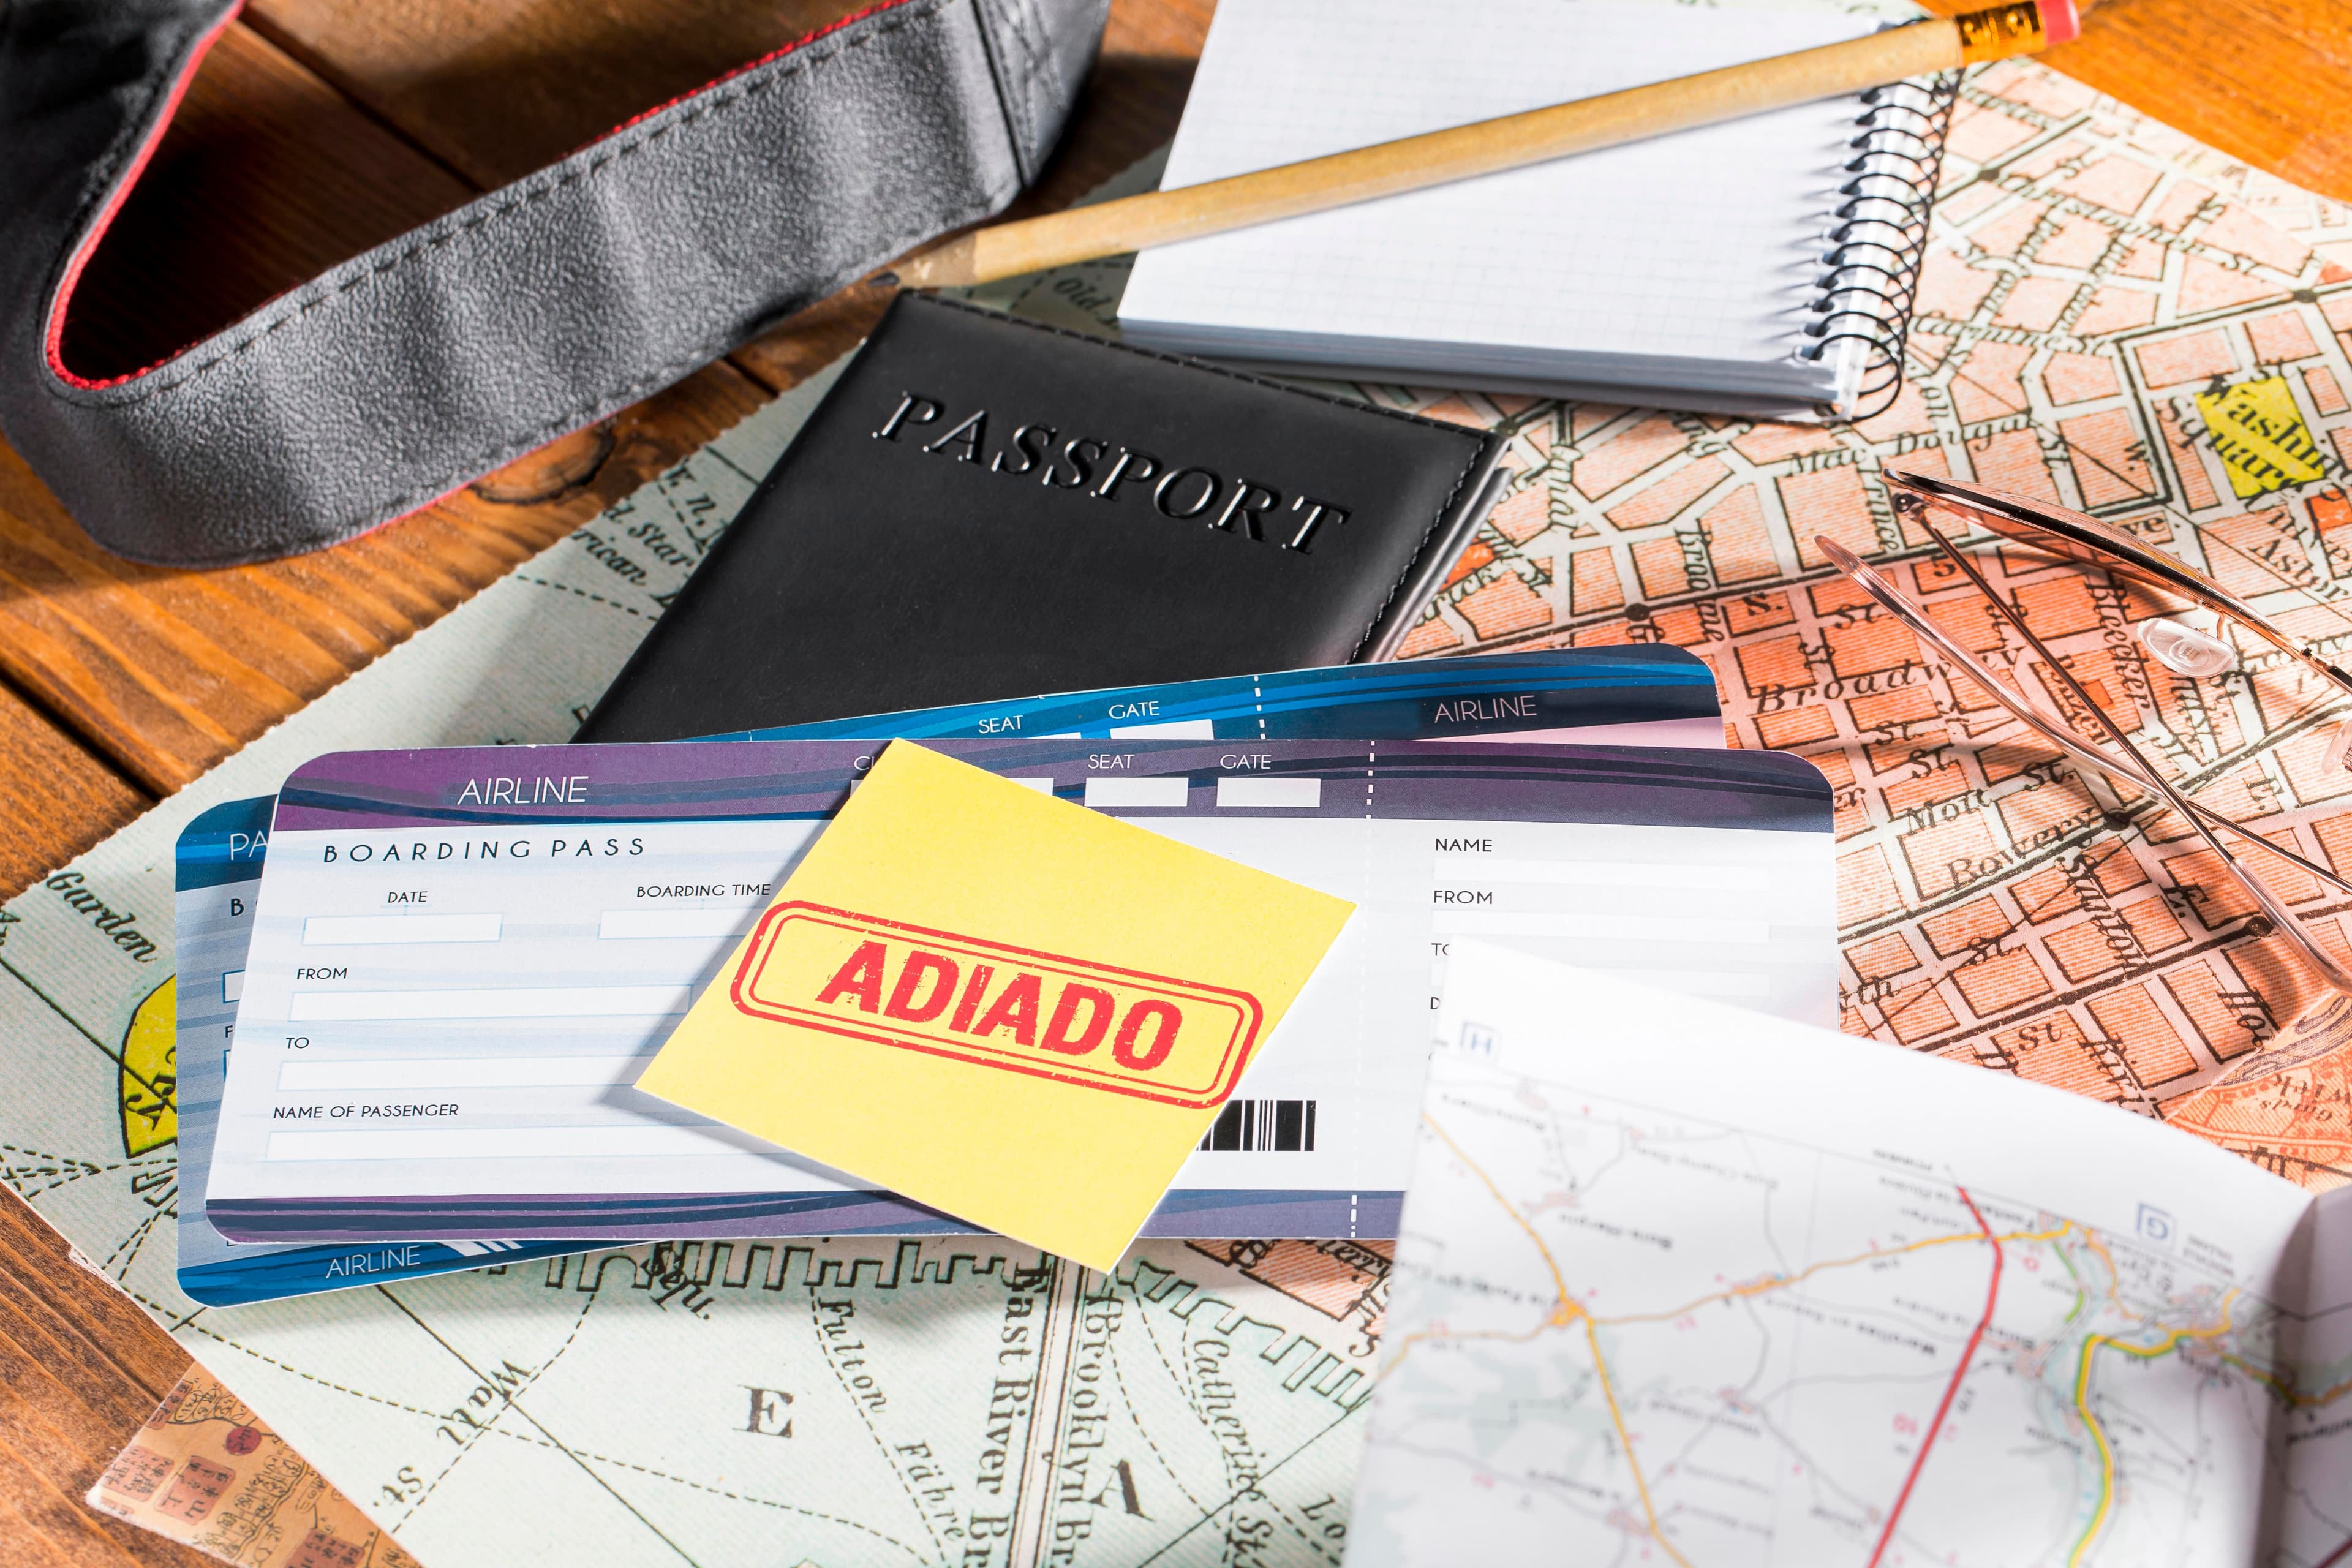
DON'T MAKE MY MISTAKE: I Didn't Check My Passport Expiration
Situation: Booked $800 flights to Thailand. Realized 2 weeks before departure that my passport expired in 4 months.
Problem: Thailand requires 6 MONTHS validity. I only had 4.
Panic mode:
- Couldn't enter Thailand with this passport
- $800 flights at risk
- Had to expedite renewal
Costs:
- Expedited passport renewal: $190 (vs $130 regular)
- Overnight shipping both ways: $35
- Rush passport photos: $20
- Total extra: $115
Stress:
- 2-week anxious wait
- Checking mailbox obsessively
- Passport arrived 3 days before departure
What I should have done:
- Check your passport BEFORE booking flights (the first planning step!).
- Renew if than 6 months validity remaining
- Regular processing (6–8 weeks; cheaper, less stressful)
LESSON: When planning, check the passport expiration as the first step.
Passport requirements:
- ✓ Valid 6+ months from entry date
- ✓ At least 2-3 blank pages for stamps
- ✓ Not damaged/torn
- ✓ Name matches tickets
Renew NOW if:
- Expires in than 9 months (gives buffer)
- Pages almost full
- Damage/wear
Processing times:
- Regular: 6-8 weeks ($130)
- Expedited: 2-3 weeks ($190)
- Emergency: 72 hours (travel within 14 days, call).
Get passport photos:
- CVS/Walgreens: $15 for 2 photos
- Get 8 photos total (extras for visas)
Money: Cards, Cash, and Currency
Best Travel Cards (No Foreign Transaction Fees)
These are game-changers:
Charles Schwab Debit Card (My #1 Recommendation)
- Unlimited ATM fee refunds worldwide
- No foreign transaction fees
- No monthly fees
- Free checking account
Why it's amazing: Every other bank charges $3-7 per ATM withdrawal internationally. Schwab refunds ALL fees. This has saved me more than $200 in fees.
Capital One Venture (Credit Card)
- No foreign transaction fees
- Travel rewards
- Good for purchases
Chase Sapphire Preferred (Credit Card)
- No foreign transaction fees
- Great travel rewards
- Trip protection
Wise Card (Multi-Currency Debit)
- Real exchange rates (no markup)
- Multi-currency account
- Cheap international transfers
ATM Strategy
Using ATMs in Southeast Asia:
Best practices:
- Use ATMs AT BANKS (not standalone machines)
- Withdraw larger amounts (fewer fees)
- ALWAYS decline ATM's exchange rate (choose "local currency," not USD)
Typical ATM fees:
- Thai banks: 220 baht (~$6.50)
- Vietnamese banks: 20,000-40,000 VND (~$1-2)
- Bali: 70,000 IDR (~$4.50)
Strategy:
- Withdraw $200-300 at once (instead of $50 multiple times)
- Charles Schwab refunds fees
- OR use Wise card (lower fees)
Cash vs. Card
Southeast Asia is still largely cash-based:
Cash needed:
- Street food (always cash)
- Markets
- Tuk-tuks, taxis
- Small shops
- Temples (entrance fees)
- Some hostels
Cards accepted:
- Hotels
- Tour companies
- Shopping malls
- Restaurants in cities
- Online bookings
My system:
- Withdraw $150-200 cash weekly
- Use cash for daily expenses
- Use card for accommodation and tours
- Keep emergency cash ($200 USD) hidden separately
Currency Exchange
Best to worst options:
🥇 Best: ATMs at banks
- Best exchange rate
- Convenient
- Safe
🥈 Good: Official exchange counters
- Licensed money changers
- Rates posted clearly
- Receipt given
🥉 Avoid: Airport currency exchange
- Terrible rates (10-15% markup)
- Shortchanging minimum needed ($50-100 for first day)
❌ Never: Street money changers
- Scams
- Shortchanging
- Fake bills
Emergency Cash
Always carry:
- $200-300 USD in cash
- Hidden in money belt
- Keep separate from daily money
- For emergencies (ATM card lost, cards don't work, etc.)
USD is widely accepted in SEA for emergencies
Notify Your Bank
DO THIS 2 WEEKS BEFORE DEPARTURE:
- Call each bank/credit card
- Tell them, "I'm traveling [dates] to [countries]."
- Get an international customer service number.
- Ask about foreign transaction fees
What happens if you don't:
- Card gets frozen (fraud alert)
- You may find yourself without access to money while in a foreign country.
- Calling from abroad to unlock = expensive nightmare
I learned this the hard way. Card frozen in Vietnam. Spent 2 hours on the hotel phone, $40 in charges, and stress.
Phone and Internet: Staying Connected
Plan Your 2026 Southeast Asia Adventures with Confidence ✈️
Get my FREE 52-page Travel Planner Bundle — the exact system I use to organize stress-free solo trips across Southeast Asia. Track budgets, create daily itineraries, manage accommodations, and journal your memories all in one beautiful PDF.
- ✓Full 2026 calendar + monthly trip planning pages
- ✓Budget trackers & expense sheets (perfect for SEA pricing)
- ✓Daily itinerary planners, packing lists & safety checklists
- ✓Travel journal pages to capture every incredible moment
🔒 Your email is safe with me. No spam, just travel tips + occasional freebies. Unsubscribe anytime.
Option 1: Local SIM Card (Recommended)
How it works:
- Bring unlocked phone
- Buy SIM at airport or 7-Eleven
- Insert SIM, activate
- Get a local number and data.
Cost: $5-10 for 30 days unlimited data
Where to buy:
Thailand:
- Airport arrivals area (AIS, DTAC, TrueMove desks)
- 7-Eleven (easiest)
- Cost: 299 baht (~$8.50) for 30 days unlimited
Vietnam:
- Airport (Viettel, Mobifone)
- Cost: 150,000-200,000 VND (~$6-8)
Bali:
- Airport (Telkomsel, XL)
- Cost: 100,000-150,000 IDR (~$7-10)
My experience: I purchased an AIS SIM card at the arrivals area of Bangkok airport. Took 5 minutes. I paid 299 baht for 30 days of unlimited data. Worked perfectly.
Option 2: eSIM (Modern, Convenient)
How it works:
- Digital SIM card
- Buy online, activate immediately
- Keep home number active
- No physical SIM needed
Best eSIM: Airalo app
Cost: $4.50-20 for various data packages
Pros:
- Instant activation
- Keep home number
- No physical SIM swapping
- Buy before you leave
Cons:
- More expensive than local SIM
- Not all phones support eSIM
Best for: Short trips, need home number accessible
Option 3: International Plan (NOT Recommended)
US carriers:
- Verizon: $10/day
- AT&T: $10/day
- T-Mobile: $5/day
Cost for 30 days: $150-300
Why not: Way too expensive for long-term
WiFi Availability
WiFi is everywhere in Southeast Asia:
Excellent WiFi:
- All hostels/hotels (free)
- Cafes (free with purchase)
- Restaurants (many free)
- Coworking spaces (paid)
- Shopping malls (free)
Speed:
- Usually 10-50 Mbps
- Sufficient for browsing, social media, video calls, and streaming.
- Digital nomad work: totally feasible
My experience: Never had WiFi issues. I was able to video call home, work remotely, and stream Netflix. Southeast Asia WiFi is solid.
Essential Apps to Download
BEFORE LEAVING:
Maps & Navigation:
- Google Maps (download offline maps)
- Maps.me (works completely offline)
Transport:
- Grab (Southeast Asia's Uber)
- Gojek (Indonesia)
Communication:
- WhatsApp (free international calls/texts)
- Google Translate (download languages offline)
Booking:
- Hostelworld
- Booking.com
- 12Go Asia (buses, trains)
Money:
- XE Currency (exchange rates)
- Trail Wallet (budget tracking)
- Your banking apps
Download offline content:
- Google Maps (entire city maps)
- Google Translate (Thai, Vietnamese languages)
- Netflix shows for flights
Creating Your Itinerary: Flexibility vs Structure
The balance: Plan enough to feel secure, and stay flexible enough for spontaneity.
My Itinerary Philosophy
Plan 30-40%, leave 60-70% flexible.
What this means:
- Rough route (north to south, or vice versa)
- First week locked in
- Rest adaptable
- Must-see experiences noted
- Time to stay longer in places you love
How Much to Plan in Advance
PLAN BEFORE LEAVING:
✓ First city + accommodation (3-5 nights booked)
✓ Rough route ("Thailand → Vietnam → Cambodia")
✓ Approximate timeline ("2 weeks Thailand, 3 weeks Vietnam...")
✓ Must-do experiences (research, maybe book)
✓ Visa requirements (apply for e-visas)
DON'T PLAN:
❌ Every single day
❌ All accommodation
❌ Exact transport between cities
❌ Daily activities
❌ Backup plans for every scenario
Planning Styles (Choose Yours)
Ultra-Planner (30% structure):
- Book: First week of accommodation
- Research: Must-see places, make wishlist
- Create: Loose 1-month outline
- Leave 70% flexible for spontaneity
Moderate Planner (50% structure):
- Book: First 2 weeks accommodation
- Research: Top activities per city
- Create: Month-by-month rough plan
- Leave: 50% flexible
Go-with-Flow (10% structure):
- Book: First 3 nights only
- Research: Entry requirements only
- Create: List of countries/cities to visit
- Leave: 90% flexible, figure out as you go
My recommendation: 30-40% structure
Why: Enough to feel secure and prepared, enough flexibility to be spontaneous and adapt.
Pacing: Slow Travel vs Fast Travel
Slow travel wins every time.
Slow travel:
- 5-7+ days per city
- 1-2 weeks in favorites
- Really explore neighborhoods
- Make friends
- Find local spots
Fast travel:
- 2-3 days per city
- Always packing/unpacking
- Surface-level experiences
- Exhausting
- Expensive (transport adds up)
My experience:
- First trip: Moved every 3–4 days. Experiencing exhaustion, incurring high expenses, and forgetting half of what I saw was a common occurrence.
- Later trips: 2 weeks per city. Deeper connections, finding hidden cafes, and making real friends.
Recommendation: Minimum 5 days per city. Ideal: 1-2 weeks.
Must-Do Experiences to Book Ahead
Some activities sell out or need advance booking:
Book 1-2 weeks ahead:
- Elephant sanctuaries (limited spots)
- Elephant Nature Park Thailand → [GetYourGuide]
- Ha Long Bay overnight cruises (better boats sell out)
- Popular cooking classes (some fill up)
Book 3-7 days ahead:
- Scuba diving courses
- Multi-day treks
- Island tours (peak season)
Book 1-2 days ahead OR day-of:
- Day tours
- Cooking classes
- Massages
- Most activities
Never need booking:
- Temples
- Markets
- Beaches
- Walking around
- Most restaurants
Pre-Departure Checklist (Final Month)
Use this as your month-by-month roadmap:
6-4 Weeks Before
- ✓ Flights booked
- ✓ Travel insurance purchased
- ✓ Passport valid (6+ months) + blank pages
- ✓ Visas applied for (if needed)
- ✓ Vaccines started or completed
- ✓ Rough itinerary created (first month planned)
- ✓ First week accommodation booked
3-2 Weeks Before
- ✓ Travel gear purchased (backpack, etc.)
- ✓ Medications filled (3+ months supply)
- ✓ Prescription copies made
- ✓ Documents copied (passport, insurance, visas)
- Email PDFs to yourself
- Print physical copies
- Give copies to family
- ✓ Travel apps downloaded
- ✓ Banks notified of travel dates and countries
- ✓ Passport photos obtained (6-8 extras for visas)
- ✓ International phone plan researched
1 Week Before
- ✓ Pack and test gear
- Pack everything
- Wear a backpack and walk 30 minutes
- Remove 30% (you overpacked)
- ✓ Exchange small currency ($50-100 for arrival)
- ✓ Print important documents
- Flight confirmations
- First accommodation booking
- Insurance card
- Visa approvals
- ✓ Itinerary shared with family/emergency contact
- ✓ Wallet cleaned out (only essential cards)
- ✓ Offline maps downloaded (Google Maps, Maps.me)
- ✓ All devices charged
- ✓ Flights reconfirmed
1-2 Days Before
- ✓ Reconfirm first accommodation
- ✓ Final packing
- Carry-on: passport, money, valuables, 1 change clothes
- Checked: everything else (if checking bag)
- ✓ Electronics charged (phone, laptop, power bank, camera)
- ✓ Phone plan activated OR SIM card plan ready
- ✓ Print boarding passes (if airline requires)
- ✓ Set up location sharing with family (Find My Friends)
- ✓ Final gear check
- Passport
- Credit cards (2-3)
- Cash ($200 USD emergency + local currency)
- Phone + charger
- Power bank
- Medications
- Travel insurance documents
Day of Departure
- ✓ Passport in hand (triple check!)
- ✓ Boarding pass accessible
- ✓ Phone charged
- ✓ Power bank charged
- ✓ Cash for airport/arrival accessible
- ✓ Arrive at the airport 3 hours early (international flight)
- ✓ Last check: passport, wallet, phone, boarding pass
- ✓ Deep breath—you're doing this!
Pro tip: Check your passport every 30 minutes until you board. Seriously.
Common Planning Mistakes to Avoid.
Mistake #1: Book the entire trip in advance.
Why it's bad:
- Zero flexibility
- Can't stay longer in places you love
- Waste money if plans change
- Miss spontaneous opportunities
Solution: Book first week only; book rest as you go (1-3 days ahead)
Mistake #2: Overpacking
Why it's bad:
- Heavy bag = misery
- Luggage fees on budget airlines
- Look like obvious tourist
- You won't wear half of it
Solution:
- Lay out everything
- Remove 30%
- You'll STILL overpack
- Pack for one week; do laundry.
Reality: You'll wear the same five outfits repeatedly. Embrace it.
Mistake #3: Not Getting Travel Insurance
Why it's bad:
- One hospital visit = entire trip budget gone
- Medical evacuation = $50,000+
- Can't get it after you leave
Solution: Buy SafetyWing before departure. Nonnegotiable.
Mistake #4: Forgetting to Notify Banks
Why it's undesirable:
- Cards frozen for "fraud"
- Stuck without money in foreign country
- Calling from abroad to unlock = nightmare
Solution:
- Call 2 weeks before
- Tell them dates and countries.
- Get international customer service number
Mistake #5: Scheduling Too Much
Why it's bad:
- Exhausting
- Expensive (transport costs)
- Surface-level experiences
- No spontaneity
Solution:
- Plan less
- Stay 1-2 weeks per city
- Quality > quantity
Mistake #6: Bringing Too Many Electronics
Why it's bad:
- Heavy
- Theft risk
- You won't use them
Solution:
- Phone + laptop OR tablet (max)
- Or just phone (seriously, it's enough)
Mistake #7: Not Researching Visa Requirements Early
Why it's undesirable:
- Denied entry
- Expensive visa on arrival vs cheap e-visa
- Stress
Solution:
- Check 3 months before
- Apply for e-visas early (cheap, easy)
Mistake #8: Exchanging Money at Airport
Why it's bad:
- Terrible rates (lose 10-15%)
- Unnecessary expense
Solution:
- Exchange minimum ($50-100) for first day
- Use ATMs for rest (better rates)
Mistake #9: Booking Cheapest Flights with 10 Layovers
Why it's bad:
- Exhaustion
- Wasted time (layovers = lost days)
- Missed connections risk
- Arrive exhausted
Solution:
- Value your time
- Direct or 1 stop maximum
- Worth extra $100 for sanity
Mistake #10: Not Copying Important Documents
Why it's bad:
- If a passport is stolen, it is much harder to replace
- No proof of insurance
- Can't remember credit card numbers if stolen
Solution:
- Email PDFs to yourself
- Print copies
- Store separately from originals
- Give copies to family
WORTH THE INVESTMENT: Planning Tools Worth Paying For
I'm all about budget travel, but these investments paid off:
SafetyWing Travel Insurance ($42/month):
- Saved friend $8,000 hospital bill
- Peace of mind is priceless.
- Can't travel without it
Osprey Farpoint 40L Backpack ($160):
- Used daily for 2+ years
- Still perfect condition
- Carry-on size = saved $100s in baggage fees
- Worth every penny
- Buy on Amazon
Quality Power Bank ($35):
- Dead phone = lost, unsafe, can't call Grab
- Anker 20,000 mAh lasted entire trip
- Charged phone 6-7 times per charge
- Amazon
Portable Door Lock ($12):
- Sketchy hostel door security
- Peace of mind sleeping alone
- Addalock works on any door
- Amazon
What's NOT worth it:
❌ Expensive travel gadgets (portable washing machines, etc.)
❌ Travel "systems" (packing cubes nice but not essential)
❌ Brand-name everything (generic works fine)
❌ Every app subscription (most free versions work)
Invest in: Safety, comfort, quality basics
Save on: Everything else
Resources and Tools for Planning
Planning Tools
Google Sheets
- Budget tracking
- Itinerary planning
- Packing list
- Free, accessible anywhere
TripIt
- Organize all bookings in one place
- Forward confirmation emails → auto-creates itinerary
- Free version sufficient
Trello
- Visual planning board
- Cards for each city
- Track tasks, bookings
Google Maps
- Save places for custom maps.
- Download offline maps
- Essential tool
Research Resources
Travel Blogs:
- Solo Female Voyage
- The Blonde Abroad
- Expert Vagabond
- Nomadic Matt
- This blog you're reading!
YouTube:
- Destination vlogs
- Packing tutorials
- "Day in the life" videos
- Good for visual preview of cities
Reddit:
- r/solotravel (best community)
- r/travel
- r/Thailand, r/Vietnam (country-specific)
- Real, honest advice
Facebook Groups:
- Girls Love Travel (huge community)
- Solo Female Travelers
- Southeast Asia Backpacker
- Country-specific groups
Booking Platforms
Flights:
- Google Flights (best search)
- Skyscanner (multi-city)
Accommodation:
- Hostelworld (hostels)
- Booking.com (hotels/guesthouses)
Tours/Activities:
- GetYourGuide (verified tours)
- Viator (wide selection)
- Klook (Asia-focused)
Transport:
- 12Go Asia (buses, trains, ferries)
- Grab app (taxis)
Official Resources
Visas:
- Embassy websites (search "[country] embassy [your country]")
- Official e-visa portals
- NOT third-party visa services (more expensive)
Health:
- CDC Travel Health (travel.cdc.gov)
- WHO (who.int)
- Country-specific health info
Safety:
- Travel.state.gov (US)
- SmartTraveller (Australia)
- FCO (UK)
- Your country's travel advisory site
Budget Planning
BudgetYourTrip.com
- Average costs by country
- User-submitted budgets
- Good baseline
Numbeo.com
- Cost of living comparisons
- Prices by city
- User-submitted (take with grain of salt)
Trail Wallet App
- Daily expense tracking
- Best app for travelers
- $5 one-time, worth it
Frequently Asked Questions About Planning
You're Ready to Plan Your Trip
Let's recap what you now know:
✓ Timeline: Start planning 3-4 months out (vaccines, visas, flights)
✓ Visas: Mostly easy (e-visa or arrival), budget $100-200
✓ Vaccines: Hep A + Typhoid recommended; schedule 2-3 months ahead.
✓ Packing: 40L backpack, 1 week's worth of clothes, under 20 lbs
✓ Flights: Book 2-4 months out, $600-1,200 US to SEA
✓ Accommodation: Book first week, and the rest as you go
✓ Insurance: SafetyWing: $42/month; buy before departure.
✓ Money: Charles Schwab debit (ATM fee refunds), notify banks
✓ Phone: Local SIM card $5-10/month
✓ Itinerary: Plan 30%, leave 70% flexible
Planning seems overwhelming at first. Seventeen browser tabs, endless decisions, and information overload.
But here's the truth: It's just a sequence of steps. Do one thing, then the next, then the next.
Today: Download the planning checklist (free resource below)
This week: Check passport expiration, start researching destinations
This month: Set travel dates, start saving
3 months from now: You could be boarding that plane.
The hardest part is deciding to go. The logistics are easier than you think. You just needed a roadmap. Now you have one.
Plan Your 2026 Southeast Asia Adventures with Confidence ✈️
Get my FREE 52-page Travel Planner Bundle — the exact system I use to organize stress-free solo trips across Southeast Asia. Track budgets, create daily itineraries, manage accommodations, and journal your memories all in one beautiful PDF.
- ✓Full 2026 calendar + monthly trip planning pages
- ✓Budget trackers & expense sheets (perfect for SEA pricing)
- ✓Daily itinerary planners, packing lists & safety checklists
- ✓Travel journal pages to capture every incredible moment
🔒 Your email is safe with me. No spam, just travel tips + occasional freebies. Unsubscribe anytime.
Ready to book?
- [SafetyWing Insurance] - Buy before you leave
- [Hostelworld] - Book your first week
- [Google Flights] - Search flights